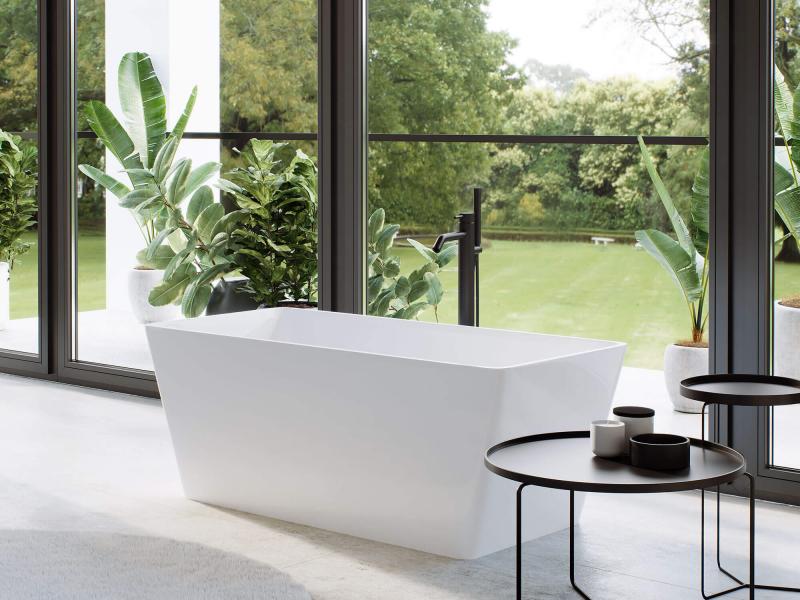
Paint & varnish bathtub: How to make the tub shine in new splendor
After a certain time it is quite normal that the surface of the bathtub shows some signs of wear and scratches. However, if the water pipes and the bathtub are still basically in good condition, it is by no means necessary to completely replace the sanitary object.
After all, replacing the bathtub always involves high costs and a lot of effort. In contrast, painting the tub turns out to be much cheaper and time-saving. How this works and what to pay attention to, explains the following article.
Painting the bathtub - the right time
The ideal temperature to pamper the bathtub with a new coat of paint is 23 degrees Celsius. Thus, the heating season is basically a recommended time for painting, as the bathroom temperature can then be easily controlled. It is also important for successful painting that the room temperature does not fluctuate during the work.
In addition, painting should be planned so that the bathroom is not entered by anyone after painting. This is because the painting result can be massively affected if dust particles are stirred up in the bathroom. The paint is dry after about five hours. If the bathtub is made of sanitary acrylic, the time required for the primer to dry must also be taken into account.
For five days after the new coat of paint should not yet come into contact with water.
The necessary equipment
.
To paint the bathtub, of course, a few working equipment and tools are necessary. These include:
Sandpaper with P120 and P360 grit
.
sponge
Citric acid-based descaler or citric acid
.
Lint-free cloth
Cutter knife
Covering film and painter's masking tape
.
Spirit or silicone remover
Sanitary repair pen or epoxy
Dust-binding wipes
Paint tray, paint roller and brush
Bathtub paint
Preparations for painting
.
In the course of preparing for painting, the bathtub must be cleaned exceedingly carefully. It is essential that there is no more dirt in the bathtub, otherwise the painting can not succeed.
Thus, the first step is to clear away all the objects that are located around the bathtub. This includes all the shelves, shelves, bath mats, curtains and towels. Then the bathroom is cleaned so thoroughly that there is as much as possible no dust in the room.
Under the bathtub is placed a film, which is fixed below the silicone joints of the tub with the help of painter's masking tape. Now the cutter knife is used to remove the silicone joints. It is important that the removed silicone does not fall into the bathtub, but on the cover. The joint must be reground several times and thoroughly cleaned - spirit or silicone remover is used for this purpose. The film can then be removed.
The next step is to mask the joints around the bathtub with painter's masking tape and thoroughly clean the bathtub again. The cleaning is done first with bathroom cleaner, before the surface is treated with the descaler. This must be applied to the entire surface and rubbed with the help of a sponge. After that, the citric acid acts for about ten minutes, before the bathtub is thoroughly rinsed with water and dried. The fittings can be protected from possible paint splashes by also masking them off and wrapping them in foil. This also prevents drops from coming off during painting.
Now the old paint of the tub is sanded off. This is done starting with a P120 sandpaper, followed by the paper with the P360 strength. Then all the sanded parts of the varnish are removed with the dust-binding cloth.
After the sanding is mastered, a little silicone remover and the lint-free cloth are used to go through the bathtub again. This will ensure that no silicone residue remains in the tub.
If there are minor damages on the bathtub, they are repaired with the epoxy resin. Once these areas are completely dry, the bathtub is dusted one more time.
The application of the paint
.
While painting the bathtub, all the windows in the bathroom must be closed, otherwise dust could come in through them. In addition, all movements should be made slowly and carefully, so that likewise no dust still present is stirred up. Clothing should also be absolutely free of lint. If a speck of dust comes into contact with the fresh paint, it can hardly be removed.
If it is a sanitary acrylic bathtub, the primer is applied at the beginning. In the case of enamel, steel or ceramic bathtubs, the hardener and the varnish are mixed together according to the respective manufacturer's instructions. The mixture is stirred for about two minutes and then transferred to the paint tub. After that, painting should begin immediately, because the paint can be processed without problems only for about 50 minutes.
The places that were repaired in advance, are first painted over with a brush, so that they get a primer. After that, the upper part of the bath, the circulation and the corners are painted with a brush. The paint should always be applied sparingly, so that there are no paint noses. Once the upper part is finished, the paint roller is used to paint over the bathtub in longitudinal and transverse movements. The repaired areas are also painted over again in the process.
After painting
.
After painting itself, the bathroom should not be entered for five hours, and the windows must also remain closed, because during this time there is a particularly high susceptibility of the fresh paint to dust. If something settles in the tub during this time, it usually cannot be removed.
The temperature in the bathroom should be kept constant at 23 degrees Celsius. The masking tape can be carefully removed after one day - the varnish will have dried as much as possible. The silicone joints can be renewed after one and a half days. However, it is essential to avoid resting on the bathtub, as the paint has not yet fully cured.
The bathtub can be used again after five days. To avoid stress cracks, however, the water temperature should only be increased slowly at the beginning.
Photo: spa-ambiente.com
This website uses cookies. The cookie technolgy provides a good user expierence. We recommande you to accept this technolgy.
Information about Cookies

 After a certain time it is quite normal that the surface of the bathtub shows some signs of wear and scratches. However, if the water pipes and the bathtub are still basically in good condition, it is by no means necessary to completely replace the sanitary object.
After all, replacing the bathtub always involves high costs and a lot of effort. In contrast, painting the tub turns out to be much cheaper and time-saving. How this works and what to pay attention to, explains the following article.
After a certain time it is quite normal that the surface of the bathtub shows some signs of wear and scratches. However, if the water pipes and the bathtub are still basically in good condition, it is by no means necessary to completely replace the sanitary object.
After all, replacing the bathtub always involves high costs and a lot of effort. In contrast, painting the tub turns out to be much cheaper and time-saving. How this works and what to pay attention to, explains the following article.